Driver Type
Categories
- Recent Updates
- Access Control
- Amplifier
- A/V Receiver
- Climate and Pool Control
- Disc Player / Changer
- Display
- DSP
- DVR
- Irrigation / Sprinklers
- Lighting Control
- Matrix Switch
- Media Server and Player
- Multi-Room A/V
- Networking
- Power and Rack Management
- Security
- Surveillance
- Teleconferencing
- Training
- Tuner
- Utility
- Video Projector
Driver Type
Categories
- Recent Updates
- Access Control
- Amplifier
- A/V Receiver
- Climate and Pool Control
- Disc Player / Changer
- Display
- DSP
- DVR
- Irrigation / Sprinklers
- Lighting Control
- Matrix Switch
- Media Server and Player
- Multi-Room A/V
- Networking
- Power and Rack Management
- Security
- Surveillance
- Teleconferencing
- Training
- Tuner
- Utility
- Video Projector
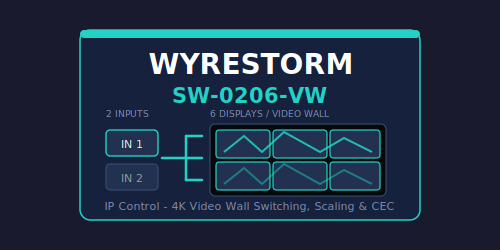
WyreStorm SW-0206-VW
By: David Bowdler
Updated: Sept. 18, 2026
Version: 0.6
WyreStorm SW-0206-VW Video Wall Switcher
Complete two-way control of the WyreStorm SW-0206-VW 2-input, 6-output 4K video-wall switcher and scaler from RTI, over IP. Every published command is implemented and read back live. Because the switcher never reports changes on its own, all feedback is polled — so a front-panel or web-UI change still shows up on the panel within a poll.
Key Features
- Video-wall presets: 1x4, 2x2, 3x2, 2x3, 4x1, 1x3R and 1x4R, each a one-tap tag that lights when it is the active layout.
- Wall modes: standard and mosaic, plus per-display break-away routing so any output can leave the wall and run its own source.
- Per-output scaling: auto or fixed output resolution, with a live readout.
- CEC display power: the whole wall or one display at a time, with the auto-CEC behaviour and its no-signal power-off delay both exposed.
- Audio: per-output HDMI mute and the analog audio output with delay.
- Input HDCP, EDID presets and the on-screen display all covered.
- Friendly names: name both inputs and all six displays once in Driver Properties and it carries through every button, the dashboard and the console — so the panel says Apple TV and Bar Left, not Input 1 and Output 3.
- Paired command and feedback tags: one tag drop wires the button and its highlight together.
- Browser dashboard: a live wall control surface served by the processor — open it in a browser or drop it into an RTI Web Object.
- Diagnostics built in: a telnet console giving connection, firmware, wall layout and per-output routing in one command.
- Sample project included: an Integration Designer file with the commands and tags already placed and wired.
Requirements
- WyreStorm SW-0206-VW 2x6 video-wall switcher on the network, with a reserved IP address
- RTI processor with network access to the switcher on TCP 23 (Telnet). The control port has no password — the admin password set in the switcher's web UI is not used by the driver
- Integration Designer 11.4 or newer, driver runtime 24 or newer
How It Works
The driver speaks the switcher's documented ASCII protocol over Telnet on port 23. A poll ring keeps source, wall layout, scaling, audio and power current, so the panel stays in step with a change made at the front panel or in the switcher's web UI without the queue ever getting in front of a user action.
Worth deciding at commissioning: the switcher can power the displays itself over CEC whenever it detects a signal. If the control system also drives display power the two will fight, and a display that turns itself back on after the client turns it off is almost always this. Either turn auto-CEC off and let RTI own display power, or leave it on and keep the Display On / Display Off tags off the panel — one or the other, not both.
WyreStorm SW-0206-VW Control Driver
Version 0.6
Two-way IP control for the WyreStorm SW-0206-VW 2-in / 6-out 4K video-wall switcher and scaler.
Setup
1. Connect the switcher to the same network as the RTI processor.
2. Give it a fixed address - either a DHCP reservation or a static IP from its web interface.
3. In Integration Designer, open Driver Properties and set Device IP Address. Leave Control Port at 23 unless the unit has been changed.
4. Optionally set the input and display names. These carry through to panels and the web dashboard, so use site language: "Signage PC", "Wall Top Left", "Foyer".
5. Load the driver. Within a few seconds Connected turns true and the status variables populate.
Licensing
This driver is free, but needs a no-cost sign-up key tied to the processor. Without a key, control commands stop after a 120-minute trial. Feedback and status keep working, so a trial expiry looks like a switcher that reports correctly but ignores button presses.
Read the MAC For Key variable (or type mac in the debug console), request a key from smarthomeprogramming.com.au, and paste it into Licence Key in Driver Properties. The key is per processor.
What The Driver Controls
Video wall: all seven quick layouts (1x4, 2x2, 3x2, 2x3, 4x1, 1x3 rotated, 1x4 rotated), plus the Quick, Standard and Mosaic wall modes. Feedback shows which layout is live.
Source: input 1 or input 2 to the wall, plus auto-switching.
Power: switcher standby and wake, and display power over CEC for any output or all six at once, with auto-CEC enable and delay.
Audio: analogue output mute, audio delay, and per-display HDMI audio mute (individually or all).
Video settings: scaler auto or manual, output resolution, input EDID (including the wide video-wall EDIDs), forced SDR per output, input HDCP, and the on-screen display.
Status: per-input and per-output connection, signal, format and HDCP, plus firmware and hardware versions.
Two Device Behaviours Worth Knowing
These are the switcher's behaviour, not driver limitations. Both are handled for you.
1. A quick layout only applies while the wall is in Quick mode. If you pick a layout while the wall is in Standard or Mosaic, the driver switches to Quick first so the button does what it says. The dashboard shows a reminder when the wall is not in Quick mode.
2. A fixed output resolution only applies while the scaler is in Manual mode. In Auto the switcher follows the display's EDID and ignores a resolution command. Selecting a resolution therefore switches the scaler to Manual for you. Use Scaler - Auto to hand control back to the displays.
Custom Wall Layouts
The switcher offers seven fixed quick layouts - 1x4, 2x2, 3x2, 2x3, 4x1 and the two rotated forms. Those are the only shapes its control port can select, and they always start at output 1.
The driver can also build any layout: any grid, with any output in any cell. That is how you split a 3-wide by 2-high wall into a left and a right 2x2, which no quick preset can express. It works by talking to the switcher's own web interface, exactly as the Video Wall page in that interface does.
Setting one up
Open Driver Properties and find the Video Wall Layouts category. Each of the six slots takes a friendly name and a layout, written as:
COLUMNSxROWS:outputs
List the outputs left to right along the top row, then the next row down. For a 3-wide by 2-high wall of six displays:
Full Wall 3x2:1,2,3,4,5,6
Left 2x2 2x2:1,2,4,5
Right 2x2 2x2:2,3,5,6
Leave a slot blank to hide it. The first three are filled in for you as a starting point - change them to match how your displays are actually cabled.
Using it
Each slot has its own Wall Layout 1-6 command and matching feedback variable, plus a Recall Wall Layout command with a dropdown. Drop the tag on a button and it selects the layout and lights up when that layout is showing. Selecting a custom layout puts the wall into Standard mode automatically.
There is also Set Wall Layout (manual), which takes rows, columns and the output list as parameters if you would rather build one from a macro.
Things worth knowing
- A layout uses each output once. Listing the same output in two cells is rejected.
- The output count has to match the grid, so a 2x2 needs exactly four.
- A custom layout stretches one source across the wall, the same as a quick preset does. It does not put a different picture on each display.
- Custom layouts need the switcher's web interface reachable from the processor on port 443. If it has been moved or turned off, the seven quick presets still work normally.
- The wall commands the switcher understands vary between firmware versions. If a layout is refused, note the firmware version from the Diagnostics page before getting in touch.
Tag Reference
Drop these tags onto buttons to auto-program the command and its feedback together. Standard RTI tags are marked (std); the rest are specific to this driver.
Power
Power On (std), Power Off (std), Power (std) - toggle
Display On, Display Off - all displays over CEC
Video wall layouts
Wall 1x4, Wall 2x2, Wall 3x2, Wall 2x3, Wall 4x1, Wall 1x3R, Wall 1x4R
Wall Quick, Wall Standard, Wall Mosaic
Source
Source Input 1, Source Input 2, Auto Switch
Audio
Mute On (std), Mute Off (std), Mute (std) - analogue audio output
Display 1 Mute through Display 6 Mute - per-display HDMI audio
Video settings
Scale Auto, Scale Manual, OSD
Custom wall layouts
Wall Layout 1 . . 6 - one per configured layout slot, command and feedback on one tag
Recall Wall Layout - single command with a layout dropdown
Applied Layout Name / Grid / Outputs - text feedback for the layout now showing
Web Dashboard
The driver hosts a video-wall dashboard on the processor, on port 9067 by default. Point an RTI Web Object at http://processor-ip:9067 or open it in a browser.
It draws the active layout as a live picture of the wall, with the connected displays highlighted, and gives you the layout picker, wall mode, source, per-display mute, audio, scaler and EDID settings with live feedback.
The wall picture is a preview drawn from the layout code. It is not a report from the switcher, so treat it as a guide to which layout is selected rather than a survey of how the screens are physically hung.
If you run more than one web-object driver on the same processor, give each a unique Web Interface Port. This driver defaults to 9067; the WyreStorm APOLLO driver defaults to 9066.
On an iPad, the RTI app caches web object content in memory. After changing the URL or the port, force-quit the RTI app and reopen it, or the panel keeps showing the old page.
Diagnostics
A telnet debug console runs on port 12549 by default (set Debug Console Port to 0 to disable it). Connect with any telnet client and type help.
Useful commands: status for a snapshot, wall for the layout and every available preset, ports for per-input and per-output detail, get and set to send any API command by hand, and probe to fire every read-only query at once. Note that raw help asks the switcher itself for its own API list, which is the quickest way to check a firmware revision against this driver.
Remote logging is available for support. Leave it off unless asked. If the processor cannot resolve DNS, set Log Server Host to the bare IP 209.38.27.58.
Troubleshooting
Connection Status stays Connecting: check the IP address, and confirm the switcher answers on port 23 by telnetting to it from a PC.
Everything reports correctly but buttons do nothing: the trial has expired. Check Licence Status and enter a key.
A layout button does nothing: check the wall is in Quick mode. The driver switches for you, so if this happens please report it with a debug console status output.
Output resolution will not change: the scaler must be in Manual. The driver switches for you when you pick a resolution.
Support
Smart Home Programming
smarthomeprogramming.com.au
Please include the driver version, the switcher's firmware from the Firmware Version variable, and a debug console status output.
This driver includes a 120-minute free trial — load it and it works immediately, no key needed, so you can prove it on site before committing.
After the trial, control commands stop while feedback and polling keep running. A licence key is tied to the RTI processor's MAC address and is issued per processor.
The MAC to quote is shown in the MAC For Key system variable, and by the mac command in the driver's debug console.