Driver Type
Categories
- Recent Updates
- Access Control
- Amplifier
- A/V Receiver
- Climate and Pool Control
- Disc Player / Changer
- Display
- DSP
- DVR
- Irrigation / Sprinklers
- Lighting Control
- Matrix Switch
- Media Server and Player
- Multi-Room A/V
- Networking
- Power and Rack Management
- Security
- Surveillance
- Teleconferencing
- Training
- Tuner
- Utility
- Video Projector
Driver Type
Categories
- Recent Updates
- Access Control
- Amplifier
- A/V Receiver
- Climate and Pool Control
- Disc Player / Changer
- Display
- DSP
- DVR
- Irrigation / Sprinklers
- Lighting Control
- Matrix Switch
- Media Server and Player
- Multi-Room A/V
- Networking
- Power and Rack Management
- Security
- Surveillance
- Teleconferencing
- Training
- Tuner
- Utility
- Video Projector
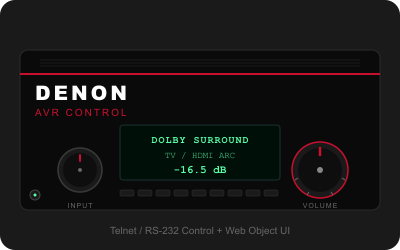
Denon AVR Control
By: David Bowdler
Updated: Sept. 3, 2026
Version: 1.22
Full two-way control driver for Denon AVR receivers via IP (Telnet) or RS-232 serial. Uses the standard Denon AVR control protocol so it works with the vast majority of network-enabled Denon receivers built from ~2010 onwards.
Tested Hardware
Verified on: Denon AVR-X3200W (firmware 1500-9143).
Compatible with (untested but uses identical protocol): AVR-X1xxx, X2xxx, X3xxx, X4xxx, X6xxx, X8500H, AVR-S540 and newer S-series.
Zone capability depends on the model — the driver always sends Z3/Z4 commands but they are silently ignored on AVRs without those zones:
- 2 zones (Main + Z2): AVR-X1xxx, X2xxx, X3xxx, S-series
- 3 zones (+ Z3): AVR-X4xxx, X6xxx
- 4 zones (+ Z4): AVR-X8500H
Built-in Web Object UI
Every install gets a touch-friendly browser control panel hosted directly on the RTI processor — no cloud server, no extra hardware. Customisable theme (30 accent colours, 22 backgrounds, shadow-box overlay), per-section visibility toggles, and per-zone URL filtering so each room's panel only shows its assigned zone's controls.
Multi-Zone IDesign Integration
All 4 zones (Main + Z2 + Z3 + Z4) are exposed as separate sources in IDesign's "Add Workspace Item" dialog. Drop Main Zone in the cinema, Zone 2 in the kitchen, Zone 3 outdoors — standard per-room source assignment does the rest.
Features
- Browse menus for Input Selection, Surround Mode, Zone 2, FM Tuner, Tone Controls, Quick Selects, System Settings — each section show/hide via driver config
- Up to 20 configurable inputs with custom names
- FM Tuner with named presets (1-56), frequency display, scan up/down
- Tone controls — Bass, Treble, Dynamic EQ, Cinema EQ
- Quick Select recall and store (MSQUICK1-5)
- Real-time two-way feedback on power, volume (dB display), mute, input, surround mode, all 4 zones
- Sound modes: Auto, Stereo, Dolby Surround/Atmos, DTS:X / Neural:X / HD, Movie, Music, Game, Pure Direct, Direct, All-Ch Stereo, Auro-3D (model dependent)
Connection
IP: Set Network Control to "Always On" in the AVR's network menu, then enter the AVR's IP address. Defaults to Telnet port 23.
RS-232: Select the processor's serial port. Settings are fixed at 9600 baud, 8N1, no flow control. Use a straight-through DB-9 cable (not null modem).
Trial & Licensing
Includes a 2-hour free trial with no registration required — installs and works immediately. Permanent licence keys available at smarthomeprogramming.com.au/store for AUD $69 (single processor licence).
Support
Built and supported by Smart Home Programming — a working RTI integrator. Email support@smarthomeprogramming.com.au with any questions.
Denon AVR Control Driver v1.22
Smart Home Programming | support@smarthomeprogramming.com.au
Overview
This driver provides full two-way control of Denon AVR receivers over IP (Telnet) or RS-232 serial. It uses the standard Denon AVR text protocol so it works with the vast majority of network-enabled Denon receivers.
Tested Hardware
Verified on: Denon AVR-X3200W (firmware 1500-9143)
Compatible with (untested): Most AVR-X series (X1xxx, X2xxx, X3xxx, X4xxx, X6xxx, X8500H), AVR-S series (S540 and newer), and any Denon receiver supporting the standard Telnet/RS-232 control protocol introduced ~2010 onwards.
Zone capability depends on the model. The driver always sends Zone 3 and Zone 4 commands, but they are silently ignored by AVRs without those zones. Examples:
- 2 zones (Main + Z2): AVR-X1xxx, X2xxx, X3xxx, S-series
- 3 zones (+ Z3): AVR-X4xxx, X6xxx
- 4 zones (+ Z4): AVR-X8500H
Atmos / DTS:X / Auro-3D selection requires the AVR to support those decoders. Older models will simply not respond to those surround mode commands.
Connection - IP
1. In the Denon menu: Network > Network Control > set to Always On
2. Set Connection Type to IP / Network
3. Enter the AVR's IP address (find it in Network > Information)
4. Port defaults to 23 (Telnet) - do not change
Connection - RS-232
1. Set Connection Type to RS-232 Serial
2. Select the serial port connected to the unit
3. Settings are fixed: 9600 baud, 8N1, no flow control
4. Use a straight-through (not null modem) DB-9 cable
Browse Menu
The browse menu provides access to Input Selection, Surround Mode, Zone 2 controls, Tone Controls, Quick Selects, and System Settings.
Each section can be shown or hidden in Driver Configuration > Browse Menu.
Subwoofer level - use these for a normal sub control
The Subwoofer function category drives the receiver's Audio-menu subwoofer trim: Subwoofer 1 Level Up / Down / Set / to 0 dB, the same four for Subwoofer 2, and Subwoofer On / Off / Toggle. Range is -12 to +12 dB.
Why this is separate from Channel Levels. The Channel Levels section below can also move a subwoofer, but only while that subwoofer is in the channel list the active surround mode is rendering. Switch the receiver to a two-channel mode and the subwoofer leaves that list, so a sub button built on Channel Levels stops responding until the mode changes back. The Subwoofer functions here are not tied to the decode mode and keep working throughout. If your receiver does not support the Audio-menu trim, these functions automatically fall back to the channel trim rather than failing.
Feedback: bind Subwoofer 1 Level (dB) and Subwoofer 2 Level (dB) - these are display-ready, for example +4.0 dB. The matching (raw) variables hold the receiver's own 38-62 wire value, where 50 means 0 dB, and are there for diagnostics only. Subwoofers In Use (count), Subwoofer Codes, Any Subwoofer In Use and Subwoofer 1-4 In Use report which subwoofers the receiver is actually driving right now. Subwoofer Control Path shows which of the two paths a button will take, and Subwoofer Last Error explains any refusal.
Channel Levels (per-speaker trim)
The driver reads and writes the AVR's per-channel speaker trims (the CV command family), covering every position up to 13.2 - including a second subwoofer (SW2), Rear Height and Top Middle. Both whole-dB and half-dB steps are supported; the AVR is confirmed to accept and echo both.
The channel list is not fixed. An AVR reports the channels the current surround mode is actually rendering - the same receiver returns 15 channels in a Dolby surround mode and only Front L/R in Stereo. A receiver in standby instead reports every channel it can address. The driver therefore re-queries the list whenever the surround mode or power state changes, and always takes whatever the AVR reports, verbatim.
From the browse menu: open Channel Levels, pick a channel, then use Up / Down / Set to 0.0 dB. The list header shows the live layout, for example 13.2 - 15 channels - DOLBY ATMOS.
From macros and buttons: the functions Channel Level Up, Channel Level Down, Channel Level Set (dB) and Channel Level to 0.0 dB each take a channel from a picker. They address the channel by name (Center, Subwoofer 2, and so on), not by position, so a macro keeps working when the surround mode changes the layout. A channel the current mode is not rendering is refused with an explanation in the log rather than sent blindly.
Feedback: Channel Count, Channel Layout (for example 13.2) and 16 display slots (Channel N Name, Channel N Level, Channel N In Use) follow the live layout. Slot numbers are positional and shift when the mode changes - bind them to a dynamic list, and use the picker functions for fixed buttons.
Step size (0.5 dB or 1.0 dB) is set in Driver Configuration > Channel Levels.
Reset ALL Channel Levels to 0 dB sends CVZRL. This wipes a calibrated speaker setup in one command, and it is the one command in this area that has not been verified against real hardware - it is deliberately not offered in the browse menu.
Info and Option (no IR blaster needed)
OSD Info and OSD Option Menu are the two remote keys that reach the on-screen signal information and the Option menu, where the receiver's own Channel Level Adjust page lives. Both are plain network or serial commands - there is no need to fall back to an IR blaster for them. Drive the resulting on-screen menu with the existing OSD Up / Down / Left / Right / Enter / Return functions.
Quick Selects
Configure Quick Select names in Driver Configuration > Smart Selects.
To store a Quick Select: set up your desired source/mode, then use Store Smart Select N function (sends MSQUICKn MEMORY).
Multi-Zone Support
The driver controls all 4 Denon AVR zones (Main, Z2, Z3, Z4). Z3 and Z4 commands are silently ignored by AVRs that don't have those zones (e.g. AVR-X3200W only has Main + Z2), so this is safe across the whole Denon range.
In IDesign's "Add Workspace Item" dialog, this driver exposes 4 separate sources:
Main Zone, Zone 2, Zone 3, Zone 4
Drop the appropriate source into each room. Each room only sees the variables and functions for its assigned zone.
Built-in Web Object UI
The driver runs a web server on port 12516 (configurable). Point an RTI Web Object - or any browser - at:
http://<processor-ip>:12516/ - all-in-one panel (diagnostic view)
http://<processor-ip>:12516/?zone=main - Main Zone controls only
http://<processor-ip>:12516/?zone=2 - Zone 2 controls only
http://<processor-ip>:12516/?zone=3 - Zone 3 controls only
http://<processor-ip>:12516/?zone=4 - Zone 4 controls only
Use the per-zone URL in each room's Web Object so the touchpanel only shows controls for that room's assigned zone.
Input Codes
Common codes: BD, DVD, TV, SAT/CBL, GAME, AUX1, AUX2, MPLAY, NET, BLUETOOTH, USB, CD, TUNER, PHONO
Licensing
This driver includes a 120-minute trial. To purchase a licence key:
1. Open a telnet connection to the debug port (default 12514)
2. Type mac and press Enter to get your unique key request
3. Email support@smarthomeprogramming.com.au with your key request
Debug Console
Connect via telnet to the processor IP on port 12514 (configurable). Type help for a list of commands.
Remote Logging (support)
Off by default. When Smart Home Programming is helping you diagnose something, turn on Enable Remote Logging under Remote Logging (Development) in Driver Properties - or fire the Remote Logging On function from a button, which needs no re-deploy. The driver then streams its log to our support server, so we can see what your receiver is actually doing without asking you for a TraceView capture.
Each instance tags its lines with the Device Label, so several receivers on one processor stay tellable apart. If the processor cannot resolve shpdrivers.services (some networks block outbound DNS), set Log Server Host to 209.38.27.58. From the debug console, rlog shows status and rlog test pushes a test line.
Terms
This software is provided for use by licensed RTI integrators only. Redistribution or resale is prohibited without written permission from Smart Home Programming.
LICENSING SUMMARY

This driver is a commercial product. A licence key is required for unlimited use; without one the driver runs in trial mode.

— TRIAL —
A free 2-hour trial begins automatically the first time the driver loads on a processor. No registration or licence key required during the trial. After 2 hours the driver disconnects from the AVR. Reloading the driver restarts the trial.

— PERMANENT LICENCE —
Price:        AUD $69.00 (single processor)
Type:         MAC-locked HMAC-MD5 key
Validity:     Permanent — no expiry, no recurring fees
Includes:     All future driver updates for the lifetime of the product
Support:      Email support direct from the developer

— HOW TO PURCHASE —
1. Install the driver and confirm it works on your customer's processor during the trial.
2. Open a telnet session to the processor on port 12514 and type "mac" to retrieve the unique key request string.
3. Visit https://smarthomeprogramming.com.au/store/ and purchase the Denon AVR Control product. Enter the key request string at checkout.
4. The licence key is generated immediately and emailed to you. Paste it into the driver's "Licence Key" config field.

— REFUNDS —
If the driver does not work as advertised on a supported Denon AVR, contact support@smarthomeprogramming.com.au for a full refund within 14 days of purchase.

— SUPPORT —
Email: support@smarthomeprogramming.com.au
Built and supported by an active RTI integrator. Typical response within one business day.